Table of Contents
The biggest challenge that comes after opting for a new web hosting provider is to migrate your website to the new platform without any issues. Tough? We know it is. But, if you follow the correct steps, you can transfer your website seamlessly and make it up and running in a few minutes. In this post, we will discuss the migration of your WordPress website from an existing web hosting provider to Bluehost.
Create Backups
The first and foremost step to any migration is creating backups. For migration of a WordPress website to Bluehost, you will need to create two backups:
- Backup of public_html folder
- Backup of the database
Backup of public_html folder
All the contents of your WordPress website are found under the public_html folder. Head over to your current web hosting provider backend console and select the File Manager option (The File Manager is from where all the folders of your website will be accessible. It may differ for different web hosting providers). There, you will find multiple folders including the public_html folder.
You can zip the public_html folder all by yourself or ask your service provider to do it for you. Keep this folder handy.
Backup of database
The other important step is to take a backup of your entire database. You can go to phpMyAdmin of your existing web hosting provider and access your database. On the top menu, you will be provided an option to export the whole of the database. Select the appropriate database and export it in the .sql format.

Files Migration on Bluehost
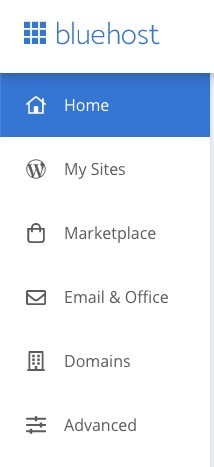
For file migration, we will be using the zipped public_html folder as created earlier. Head over to the Bluehost login area and click on “Advanced”.
You will then be redirected to the cPanel area which will have multiple options.
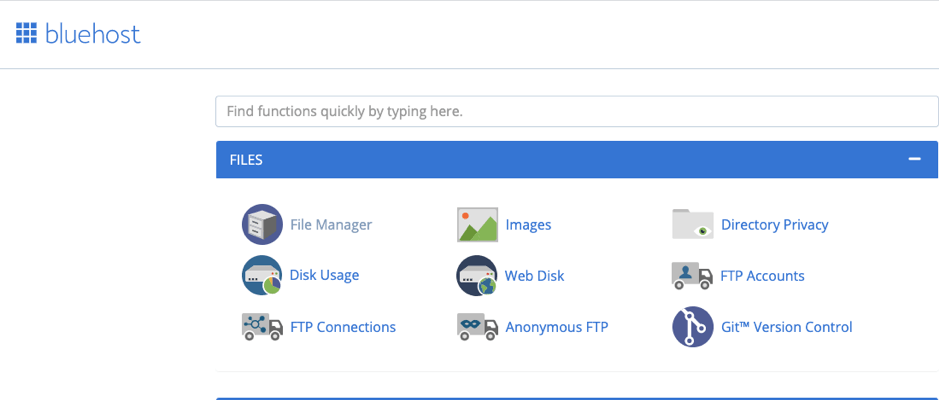
Click on File Manager.
Now create a new folder with the name “backup” and transfer the public_html zipped file to this folder.
Note: You can upload at max 500 MB file using the “Upload” option. To transfer a bigger file, you will have to use an FTP client like Cyberduck or FileZilla to transfer the zipped file.
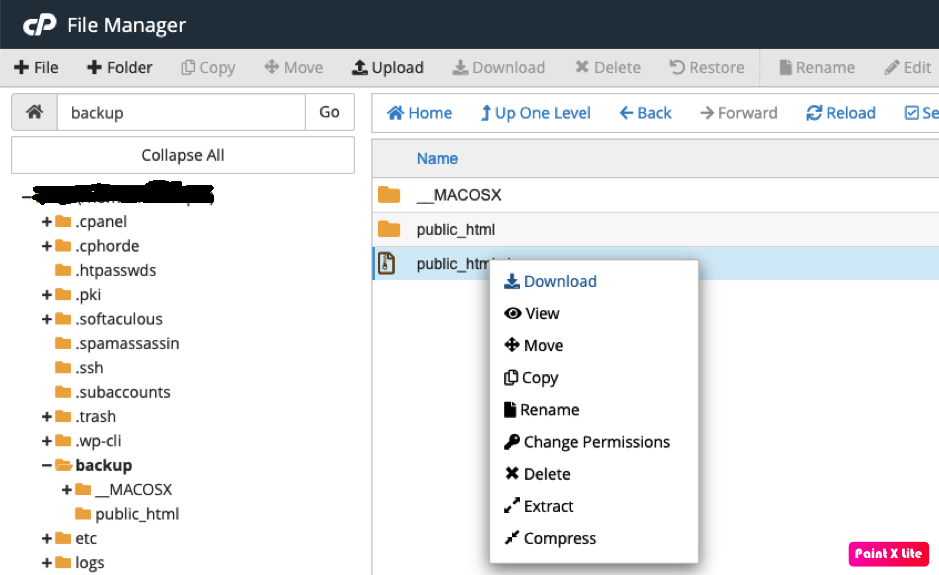
Once the transfer is complete, you will have to extract the zipped file. You can do this by right-clicking on the zip file and choosing the “Extract” option. You will now see the public_html folder in the “backup” directory.
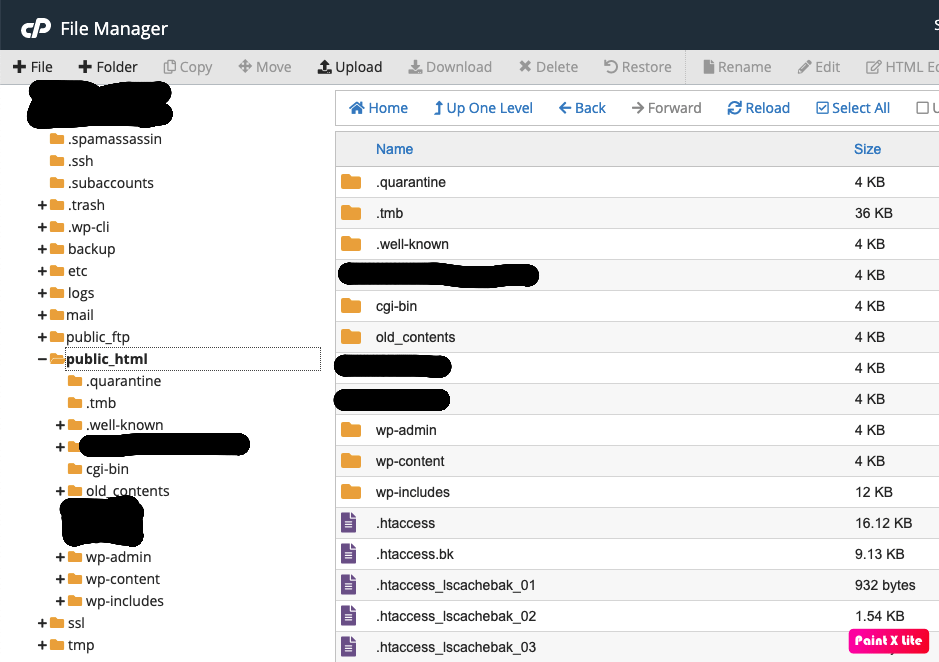
Now, go to the public_html folder just extracted and click on “Select All” to select all the files and directories.
Then, click on “Move” option to transfer all the selected contents to the primary public_html folder (not the one inside the backup folder). The primary public_html folder will now contain all the existing data of your website.
Database Migration on Bluehost
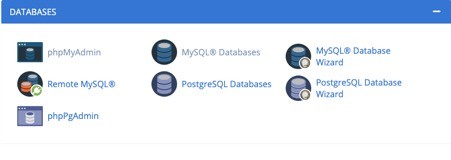
For migration of the database, a new database will have to be created on the new web hosting platform. In the cPanel area under the DATABASES, click on MySQL Databases.
Create a new DB and a new DB User.
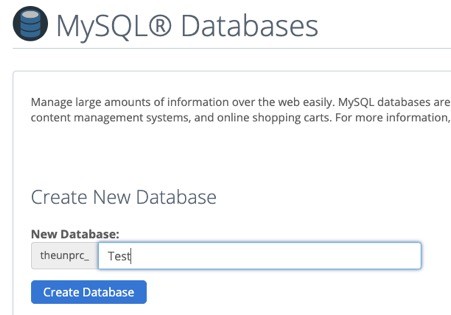
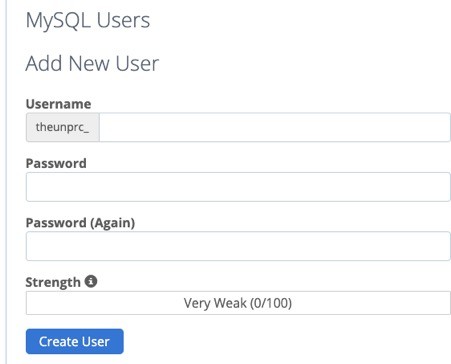
Now, attach the new DB with the new DB user (This user should be given all access/privileges to DB). Let us assume that the new DB we created is “TestDB” and the new DB User is “TestDBUser”.
Next, go back to the cPanel and select phpMyAdmin under DATABASES (Check Image 6).
Select the newly created DB and “Import” the .sql file that was backed up/exported earlier. If everything goes well, you will get a successful message for the database migration.
Updating wp-config.php
After the DB creation and its configuration, the wp-config.php file will have to be updated for new DB entries.
Go to the cPanel -> FILES -> File Manager and update the wp-config.php file under the public_html folder for the entries: DB_NAME, DB_USER, and DB_PASSWORD.
/** The name of the database for WordPress */
define( ‘DB_NAME’, ‘TestDB’);
/** MySQL database username */
define( ‘DB_USER’, ‘TestDBUser’ );
/* MySQL database password */
define( ‘DB_PASSWORD’, ‘xxx’ );
And, that’s it. After these three steps (file migration, DB migration, and wp-config.php update), the migration of your WordPress website to Bluehost is completed and the website is ready for use.
Important Points
- Before the migration of your WordPress website, make sure the Nameservers are pointing to the Bluehost Nameservers or Cloudflare Nameservers (in case you wish to use CDN). This will ensure that you are not working on the old platform.
- If you are using Cloudflare CDN, make sure that the DNS entries relating to your website are pointing to your actual webserver (esp. for A records).
- Use FTP if you are transferring big files to the new web hosting servers. You can choose clients like Filezilla or Cyberduck for the same.
- Take the backup of the whole public_html folder rather than wp-content folder.
- Take the backup of the entire DB using phpMyAdmin’s “Export” functionality.
- Test your website when the migration process is over. Make sure the website is working as it should. Look for any error logs to identify an issue.
- Make sure that all the plugins are working fine. If not, try disabling each plugin and re-testing to isolate the culprit plugin.
- Restore any configuration (if it was present on your previous platform) related to the firewall on your new Bluehost environment.
Additional Notes
If you are still stuck with any issues, contact Bluehost customer support, and they would be happy to help.
Please note, that the Bluehost team would not migrate your website from the previous platform. They have a separate package for that.
For free transfer, Bluehost will provide you with the migration steps that you will have to perform on your own. The Bluehost team though would cater to any request during the migration, if it is feasible.
Also, if any functionality does not work after migration, you may need to troubleshoot it yourself as a particular functionality is something that is developed by you and was working on the previous platform.
CURATED & WRITTEN BY
AYUSH PANDYA
(AUTHOR – THE UNPRECEDENTED CULT)